
Importing school data requires you to create a Common Transfer File (CTF) from SIMS and then import this into iTRACK. Data in SIMS changes on an almost daily basis; pupils leave and pupils join the school and FSM data changes as do many other pieces of data. It is recommended that you create and load CTF files perhaps once a term. Each time you load a new CTF file:
- Pupils who are new to the school are added to iTRACK.
- Pupils who have left the school are marled as leavers in iTRACK.
- Pupils whose attributes have changed have their attributes modified.
IMPORTANT: It is critical that you always export ALL the pupils in school for loading into iTRACK. You should never load a CTF file that only contains SOME of the pupils in your school.
IMPORTANT: At the start of a new school year ensure that you 'Roll Forward' from the School Year option at the top of the screen before you load a new CTF file. This ensures that your 'old' year 6 now are archived as year 7.
Each time you import a new CTF and load it into iTRACK the system will automatically create a backup copy of your data to provide a recovery point. Creating a CTF file is a straightforward process which your school SIMS administrators will be very familiar with and with which they will be able to help you. To do this, log onto SIMS and then go to Routines/Data Out/CTF/Export CTF
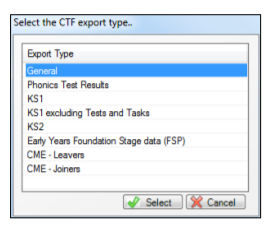
You will then be presented with the Export CTF screen as seen on the next page. You must then perform the following steps (the screen shot on the next page shows you how to perform these steps):
Step 1:
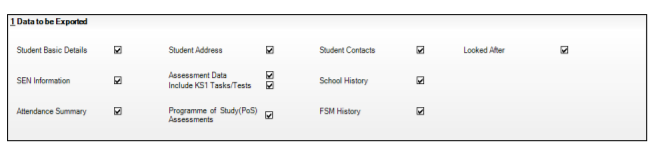
Select the data to be exported by ticking the boxes below.
PLEASE NOTE: The Student Address and Student Contact boxes should be unticked from the image below
Step 2:
In the ‘Student Options’ section ensure that the View is set to ‘Current Students’ and that also the ‘Include Students Already Exported’ box IS ticked. Then click the ‘Refresh Students’ button to update the list of available students.

Step 3:
Now move onto the ‘Students’ section of the screen. This now shows all of the available student details which you can include in the CTF file you will be creating. It is critical that you always export a full list of pupils. Never export a partial list of pupils for importing into iTRACK.
Step 4:
Next you need to pick a destination for the CTF file you are creating. We suggest that you select your local authority as the destination. You will not be sending the data to the LA it is only acting as a dummy. Once the CTF file is loaded into iTRACK you should delete it from your computer.
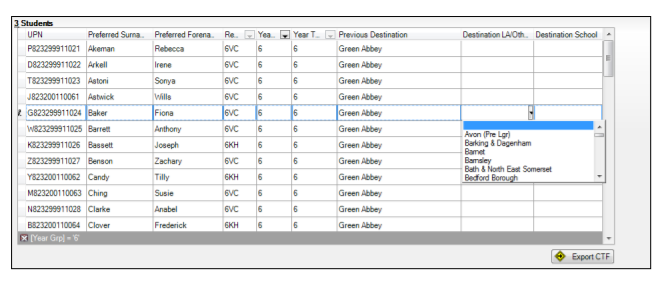
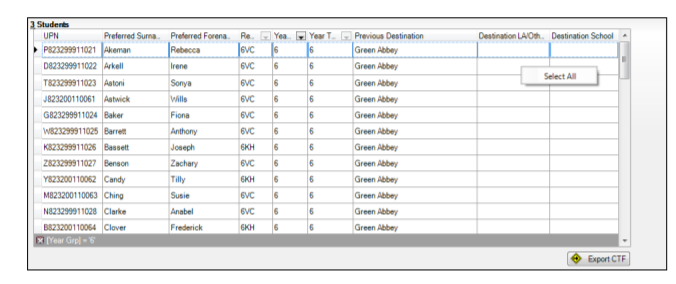
IMPORTANT: Before selecting the destination, right-click the mouse on an empty destination box and an option will be available to ‘Select All’. If you select this then all pupils in the Students grid will be selected and therefore you will only have to select the destination of the CTF export once rather than doing it for each student.
Step 5:
After the destination has been selected, simply click on the ‘Export CTF button’. You will then be taken to an ‘Exception Log’ screen. This will detail any errors that may have occurred during the export procedure.
Hopefully this screen will be blank if your SIMS system is up-to-date. However do not worry if you do see a list of errors; the only ones you are interested in are those which say ‘NOT EXPORTED’. In the example above, we can see two pupils with missing UPN numbers and one pupil with mother tongue missing. The two pupils with ‘NOT EXPORTED: UPN missing’ will NOT be in the CTF file and the SIMS data should be updated prior to creating the CTF file otherwise you will have missing pupils.
Navigate to the location of the CTF Export Directory (as defined in Tools | Setups | CTF), then identify the newly created XML file for export.